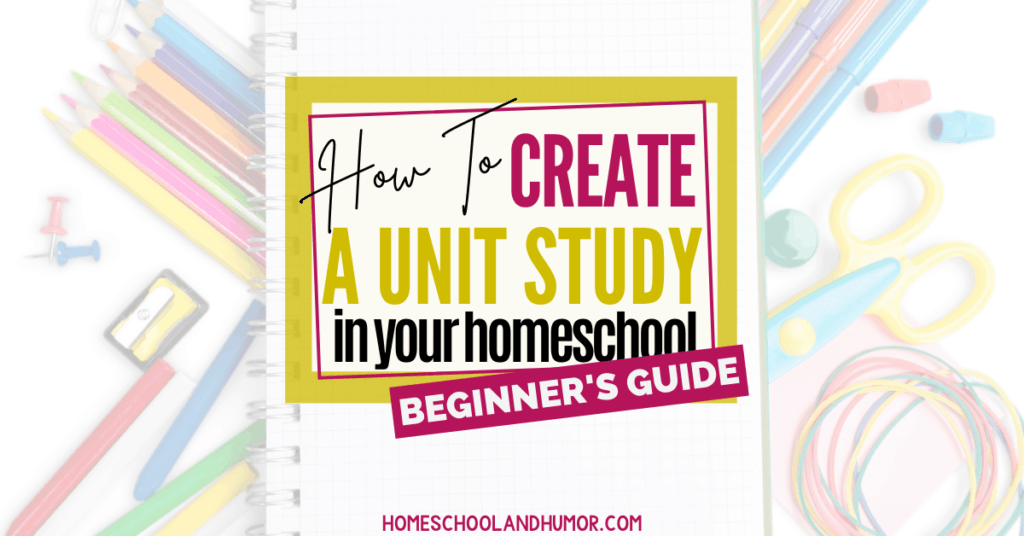
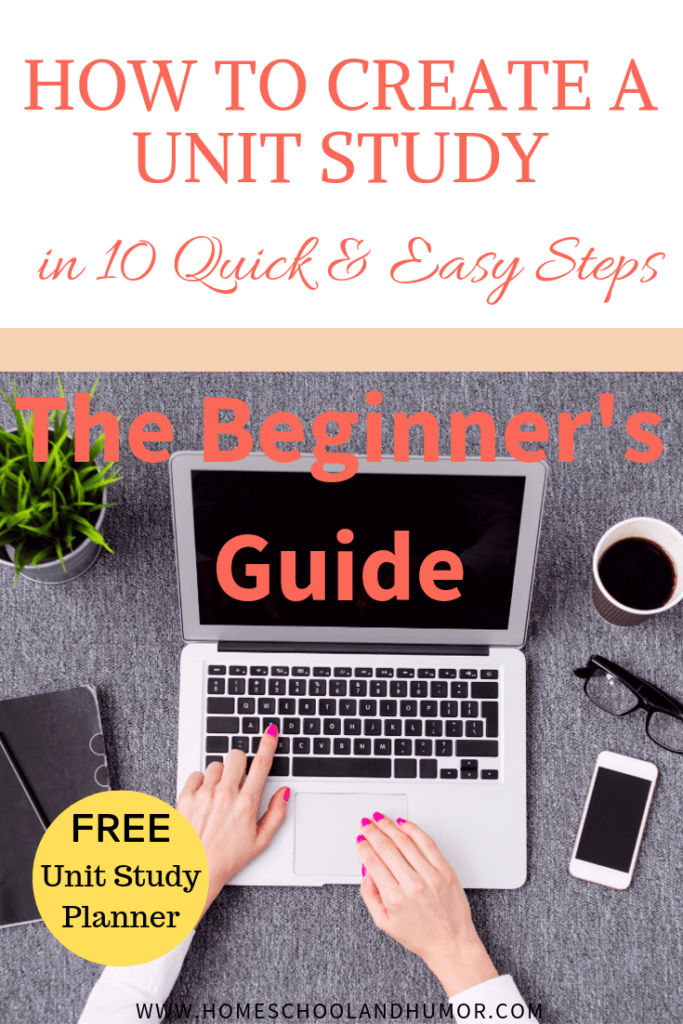
How to Create a Unit Study: The Beginner’s Guide
If you’re a homeschool mom that wants to expand more on learning a particular topic, person, place, concept, subject, or pretty much anything else, then unit studies are definitely for you. No matter what your homeschool approach is, and no matter what the area of study is – and regardless of the ages of your children – creating a unit study will only serve to impact your child’s understanding of a concept on a much deeper level. And I bet you can learn a thing or ten in the process yourself!
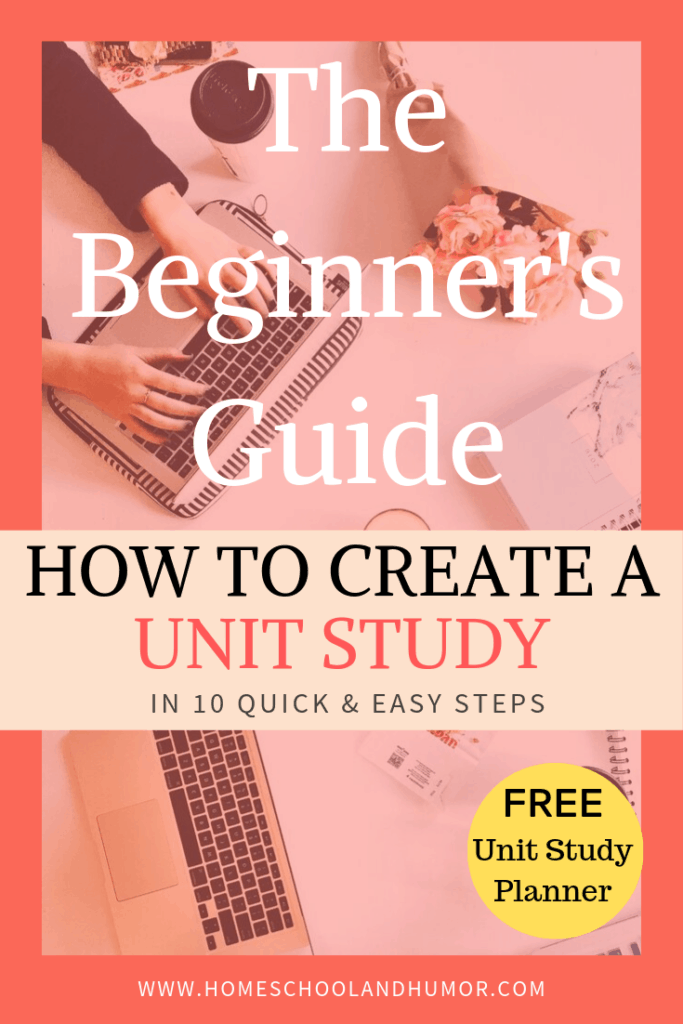
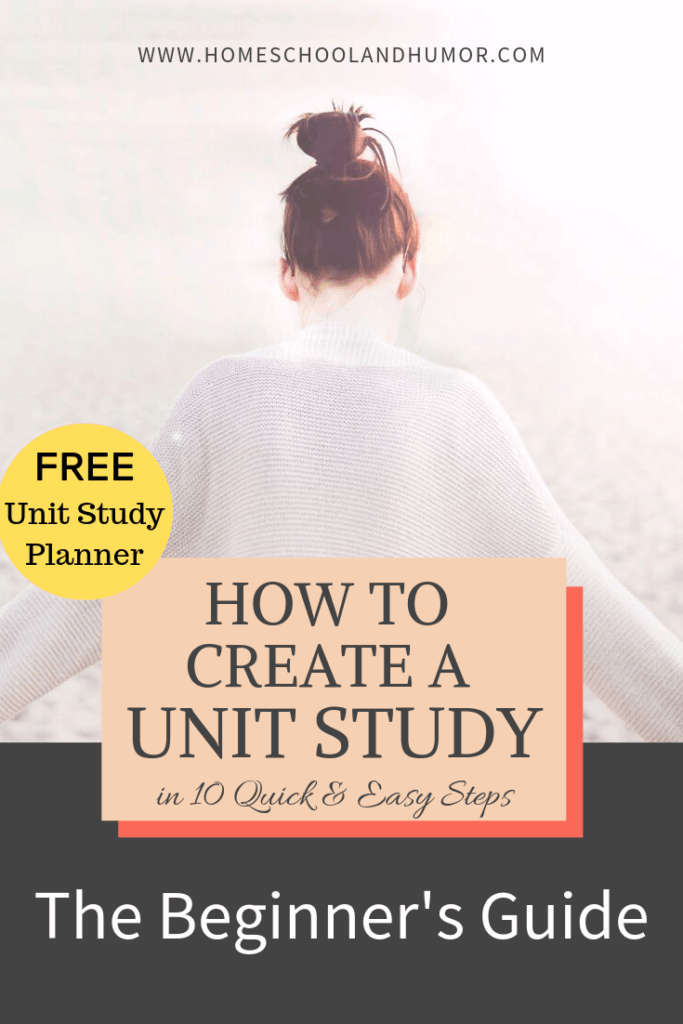
Settle in with your favorite homeschool coffee mug because this particular article is a Beginner’s Guide on how to create a unit study. I include the same step-by-step process that I use when creating a unit study, along with a free unit study planner for you to download and print out. You will also see a few examples of unit studies as well as a few neat places to get unit studies from (if you would rather not create them every single time yourself), which is such a blessing when you’re short on creativity time. Let’s dig in!
Disclosure: This post may contain affiliate links for your convenience. See my full disclosure policy here.
Quick Navigation
Two Ways of How to Create A Unit Study
One way I utilize a unit study is by including all subjects within one major package instead of individualizing each subject in a traditional setting. All disciplines of the core subjects are grouped together into one bundle so that study touches on all subjects related around one main topic.
For example, if you want to study Earth you can incorporate all disciplines:
science of astronomy focused on the planet Earth,
handwriting by copy work of scripture in the book of Genesis within the Bible regarding creation of Earth and the Heavens,
literature by poetry of “The Road Not Taken” by Robert Frost,
reading a book on Earth and add a book report assignment for reading comprehension,
geography in labeling the continents and major oceans,
art or hands-on projects for crafting Earth’s layers from a styrofoam half ball and labelling the layers of the crust,
watch a movie “Journey to the Center of the Earth,”
history for Earth on its various creation theories or introduce a dinosaur study (as a lead-in to your next unit study),
nature study via nature walks while collecting leaves and putting into a nature journal,
seasons of the Earth, and
math with geometric shapes or fractions.
You could also celebrate Earth Day during the week of your Earth Unit Study – just plan ahead!
If you like my Earth Unit Study example, feel free to use it. I will list some more amazing free unit study focuses towards the end of this article.
The second way to utilize unit studies is by focusing the unit study on just one subject or discipline, if you like, rather than encompassing all of the subjects. Some unit studies are pure literature-based while others are nature-related only. Some are based on scientific focuses and others on grammar.
The point is to dive deep into XYZ topic and thoroughly research and learn everything there is to know about XYZ.
Some believe that it is important to lead into a unit study that your child is extremely interested in. Others believe that a subject that your child is lacking interest in could actually make him or her more interested in this lackluster subject by doing unit studies! Either approach is fine and completely up to your child’s learning style and how it fits best with your family. All in all, doing a unit study is just a fun way to break up the conundrum in your everyday school setting.
Regardless of the focus, they all really serve one commonality: a jam-packed adventure for the kids to commit what they have learned to memory!
There are plenty of resources out there where you can purchase unit studies and follow their directions. In fact, I have used a few in the past before starting to create my own unit studies.
If you like to save money, as I do, you can easily make your own unit study. And that’s what this article is all about. So let’s jump in!
Do a unit study on multiple subjects. Include many subjects within one major study (instead of individualizing each subject in a traditional school setting). All those subjects are grouped together into one bundle so that the study touches on all subjects related around one main topic.
Focus the unit study on just one subject only. You will not be encompassing all of the subjects together as in approach #1. Dive deep into a topic and thoroughly research that topic in order to know everything there is to know.
Prepare for Planning a Unit Study
First things first, prepare to plan your study. For example, before I do anything, I plan the whole school year prior to the start of each new homeschool year. Although I do not list out every single topic and all the page numbers from a to z, I do print out everything month by month with the general outline and quarterly goals of what we will cover.
Because we travel just way too much, I am not one of those homeschool moms who print everything out in an orderly fashion for the entire school year and store it in my filing cabinet with cutsie labels. As I said, we just travel way too dang much for that, hence the reason why I print out our programs on a month to month basis.
So just like the month-to-month homeschool planning and general outline, I give myself a basic outline of what to cover for the unit study. More like a goal plan. “The Big Picture” outlook, if you will.
You might be wondering how much time per unit study topic. You choose the length of the unit study determined by what all you want to include inside of it. If you want to gently touch on a few topics in a more creative way then just do a 3-day unit study or a 5-day unit study. If you want to go deep into the main idea, go for as long as 6 weeks. An average length for a unit study is between 1 to 2 weeks.
It is important to make an outline of what you will cover once you do decide on how long your unit study will be. Break it up into sections to make it easier on yourself as well as to make it easier and more solid for your kids to really grasp the concepts you’re trying to teach them.
I would suggest planning out all of the subjects you want to include. So say you are going to include spelling into your unit study, Divide each spelling assignment or spelling activity into the number of days you want to teach the unit. Say you’re going to teach it for 10 days. That’s 10 different spelling activities each day. Start there, with spelling. List out all the spelling activities you can think of that would go great with your chosen unit study topic.
Then do the same with the other subjects you decided to include. Once you have all the assignments for each subject, divvy them up by day. Usually, when I get to brainstorming assignments and activities my creative juices start flowing and I end up with way too many options! If this happens to you, save them for the next unit study.
Which brings me to this advice: pull our an excel sheet, a numbers sheet if you’re a Mac user, or a Google Doc, and keep track of all of the different assignments and activities for each subject. Before you know it you will have a whole arsenal of activities to choose from and you won’t need to do much brainstorming on what to do!
You can also use a weekly Unit Study Planner that lists out each day for you to enter your assignments in and also lists the subjects for the activities to include. I have just the one for you and it works well in my own homeschool unit study planning:

Free Unit Study Planner
Organize your best self - Grab your free Unit Study Planner!
Thank you!
You have successfully joined our subscriber list.
The Steps to Plan a Successful Unit Study
You can measure the success of a unit study during or after it has been completed by the mere enthusiasm of your child. Establish the main idea of the unit to your kids from the very beginning so they know what to expect. Make this a fun time doing a different process of learning to make it stick in their little brains. As with anything, structure the unit study to achieve ultimate success.
The 10 quick and easy steps to planning a successful unit study include:
- The Foundation
- Put into your homeschool planner (a) the days to plan and (b) the days for the unit study. Calendar it. You can use my free Unit Study Planner or get your hands on this amazing Homeschool Planner I tend to refer to time and time again.
- Brainstorm.
- Also known as “freewriting,” think about all of the elements of this particular unit study. What makes it unique and different?
- Scope and Sequence.
- Look into your child’s scope and sequence at what he or she will be studying in their curriculum. If you created their curriculum then you already have a pretty good idea of what they will be going over. If you ordered curricula, just flip to the beginning of the book where it lays out the scope of the level. If it doesn’t have this, then check the table of contents. Of course, you can always look into my favorite book that I use to create our homeschool curriculum called Home Learning Year by Year: How to Design a Homeschool Curriculum from Preschool Through High School by Rebecca Rupp.
- Choose the Unit or Theme.
- The unit is the main idea. This is the focal point of your entire unit study, what each subject will revolve around.
- Select the topics that relate to this unit and are appropriate for your child.
- What categories will you include? Which subjects?
- Choose your resources and activities.
- If you need to include anything special to complete an assignment or if you are going to be including a special activity (such as my science topic for my aforementioned Earth example), now is the time to decide how many “major” projects or activities you are going to include each week, or if you are going to make a major activity each day.
- Select your books.
- Each unit study really should have 1 or 2 books that put emphasis on the unit. Or perhaps you first chose the book to do a unit study about?
- Plan your hands-on activities and projects.
- You want to plan a few activities outside of the normal worksheet yo-yo. Plan one or two movement activities or big hands-on projects, depending on the length of your unit study.
- Using Music and Video.
- Incorporate the love of music in your unit studies. Utilize YouTube videos into your unit study, and keep track of future video lists by creating playlists.
- Finalize your unit study with projects and quizzes.
- Assess how your children faired during the unit study in order to implement desired results for your next unit study.
Step 1: Planning
Plan the days for planning your unit study. Then plan the days when you will do the actual unit study.
This step is just preparing to plan it.
For planning and preparation: Let’s say you want to do one unit study for every month you are “in school.” And let’s say you want your unit study to be just one week long, so 5 days. Since you can do as little or as many days as you want, this is entirely up to you. It all depends on how in-depth you want to expand upon the theme or topic or main idea. You can do a unit study for 3 days or you can do one for 10 days. Decide the length you want your unit study to be.
There is no wrong way to do this. You need to have the foundation down first. Make sure you plan ahead in your planner in pencil for both the planning part and also the unit study learning days.
Since we are planning one together, we will plan 5 days long for the unit study. We will look in our planner calendar in the coming weeks or months ahead and decide which week(s) will be best for our unit study. Once that is decided, plan a few days or all week long next week to prepare for the unit study.
Use my free unit study planner I provided above. It will save you so much time and organize your unit study as you plan away.
Step 2: Brainstorming
Brainstorm all of the elements of your unit study so you see it as a Big Picture view before you dive head-first into the smaller details. Since we need to have the overall picture down before we do anything else, let your mind wander.
Pull out a piece of paper and free-write anything that pops into your mind that you would want to include in your unit study. You know your children best, you know your teaching style and their learning styles, so you know how to incorporate it all together. What parts of the school day do your children most look forward to? Which parts of school do they struggle it? Think of some creative ways to teach upon their struggling areas. This is a great opportunity to go about it from a different angle.
Unit studies are a wonderful opportunity to trial and error new adaptations of concepts to your kids. You’re mama bear – you notice when things are just “off” better than anyone else in your family. I’m sure you’ve thought a few times about the direction of a certain concept or an entire subject. Now is the time to try something different!
Think about how long you want the unit to be, then think about what pieces of information you deem important to include. How will you include those pieces and which types of learning elements will you teach?
When I speak of elements, here is what I mean:
The Elements:
- Books
- Videos
- Field Trips
- Book reports
- Movie reports
- Timelines or maps
- Important dates
- Important people
- Highlights
- Compare and contrast
- Essay paper
- Music
- Art
- Worksheets
- Journals
- Study aides
- Flow chart
As you can see, the elements are just items you want to include, and you can tell that the list can keep going!
At this point you have a good list of the elements that you want to include into your study and on which days you will incorporate such elements. Great going!
Step 3: Scope and Sequence Check
I love this part! I love looking to see what my children are set up to learn this year, because then I can incorporate new fundamentals into their homeschool that they’re ready to take on! Learning steps at its finest!
What are your children set up to learn this year? Did you check out that book I highly recommended up top? Check it out! Or by all means, see if your local library has it be grab yourself a copy now!
Hopefully, at this point, you have a general idea of your entire homeschool year and on what topics you will be covering for each child (more on teaching multiple later on).
Will it be an introduction to multiplication this year in math? Early American settlers? Medieval Times? Will you be covering how to edit a paper or parts of speech? Will your kids be introduced to book reports this year?
As I mentioned earlier, to see what your kids will be covering this year look into the front matter of their textbooks. Usually the company will have a list of the scope and sequence that will be covered in the text, aside from the table of contents. If they do not have this scope and sequence then by all means check out the table of contents. And if you are out of luck there, do a flip through of the textbook.
If you created your own curricula this year, you’re already one step ahead.
TIP: I like to make a list of what the kids will be covering in an excel document separated by subject. This really helps me when I decide on their assignments for the year. I recommend you do the same so you can plan your next unit study much faster.
Master Books is good about adding the scope and sequence in the front matter of their books as well as The Good and The Beautiful. Apologia does this as well, in addition to creating a tentative lesson plan for you (since I only have experience with their science curriculum I know that the tasks and assignments can get a bit harried so their lesson plan is a great starting point to creating a science lesson plan that fits your family).
Determine what particular main idea you would like to focus on for your unit study. Will you focus on a person, a place, a renowned date in history, an item, a book, an animal, a scientific theory, or an era development? This is a great starting point on the topic you’re going to choose (next step).
At this point, you have planned the unit, gotten a list of elements to choose from, and checked your kids’ textbooks and their course concepts. You probably have an even better idea of what they are going to cover this year. You’re ready for the next step.

Step 4: Choosing the Theme (or Main Idea)
From doing the previous step, now you have a good stronghold on what your child will be learning this year, which leads you to decide the next step: choosing the theme of your unit study.
The term “theme” is interchangeable with the term “unit” as well as the “main idea.” I will be using all of those terms (as you can see!) through this guide.
Choose a unit to expand on to base your study around. Say, for instance, you decide on an astronomy theme since your kids will be studying astronomy and all of the planets this year. You want to be as specific as you can when deciding on a theme.
Do not just go with “astronomy” and leave it at that. There’s wayyy too much there to even begin to decide where to start!
Instead, let’s break it down even further: Venus is a good starting point. But what about Venus? They have a lot of storms there, that’s for sure. So you can either do a Venus Unit Study where perhaps each day is an introduction of a new concept about Venus, or you could do a unit stud on Storms of Venus Unit Study, where each day is a different focus on the storms, how they are created, how they compare to Earth’s, what starts them, the velocity of these storms, how they affect its own atmosphere (if it even has an atmosphere!), and so on.
I can be a bit indecisive at times, so this is actually the hardest part for me! 😉 There are thousands of main ideas you could choose. And it doesn’t even have to focus on a subject. You can choose a chapter book or a read aloud book or a short book to base your unit study around.
Get that piece of paper out and free-write all of the themes that come to mind. Don’t stop until you’ve exhausted all creative juices. Then get a highlighter and go back and highlight your favorite ones or your children’s most-likely-to-love topics.
Once you have your highlighted topics, think on those topics. Does the topic cover so much information that perhaps you can break it up into mini-unit studies over the course of the month? Turn it into a 2 or 3-day unit study for each week?
Use the elements we spoke of earlier and see how they will fit into your theme. Make a column-row list with your elements on the rows and your activities for each element on the columns. If you can fill this list up, you have yourself a theme.
Step 5: Choosing the Topics
In this step, you will choose the topics that relate to the Main Idea (or Theme) in which you chose in step #4.
From my experience, I almost always include these 4 categories and then I go from there:
- Events
- People
- Places
- Terms
Categories, or topics, are what help structure your unit study and, by usually including those 4 topics I just listed, you can build your unit study from there. If you think about it, whatever it is that you talk about in everyday conversations normally revolve around people or events or places. As such, you can think of a unit study as just one long conversation. It’s as if you want to explore all avenues of a main topic with your children; thereby, you include those avenues into your unit study that you want them to learn.
Let’s keep going with our Astronomy theme, yet we will dive deeper than just general astronomy. Say we are doing a Moon Unit Study, and in that moon unit study we will go through the events, people, places, and terms as a starting point when we make our unit study.
When discussing events, think about what in history occurred (here’s your history subject). Or discuss what the story’s main event if your unit study is about a book. Perhaps something is happening ongoing or it would have happened if…. I hope you get the idea.
Therefore, the Events in our Moon Unit Study could be the different phases of the moon. And with that event category, we could do quite a number of hands-on projects in visually seeing the phases of the moon. In fact, there are a number of worksheets available online in regards to the phases of the moon.
Whether your unit study is fictional or nonfictional you can include people in just about every single one. A major key player in our moon unit study example is Neil Armstrong, the first man who walked on the moon. Perhaps we could tie in both history and literature and comprehension in this particular category.
Equally fascinating as “people” and “events” is how “places” can almost always be included in unit studies. In just about every topic you hear or talk about includes a place where it happened, or it’s a destination goal, or it’s what happened in the past at a certain place. We’re talking, country, continent, city, house, backyard, street, Little Timmy’s treehouse, where ever. With Goldilocks and the Three Bears, the place was the bears’ house. That’s where she snooped a mussed up everything!
The place in our moon example is the moon itself, or it could be the Milky Way Galaxy, the universe, the solar system, even Earth. You could include biblical studies to tie into the universe. You could also use your spelling subject here since there are several long words when discussing the solar system.
Try to include terms in your unit studies as much as possible. Introduce your child to the key terms that are important to that unit study. These Word To Know or Vocabulary words. Words they may not hear every day but could, from now on, correlate this particular topic/theme with these particular keywords.
Here is another example using the 4 categories – events, people, places, and terms:
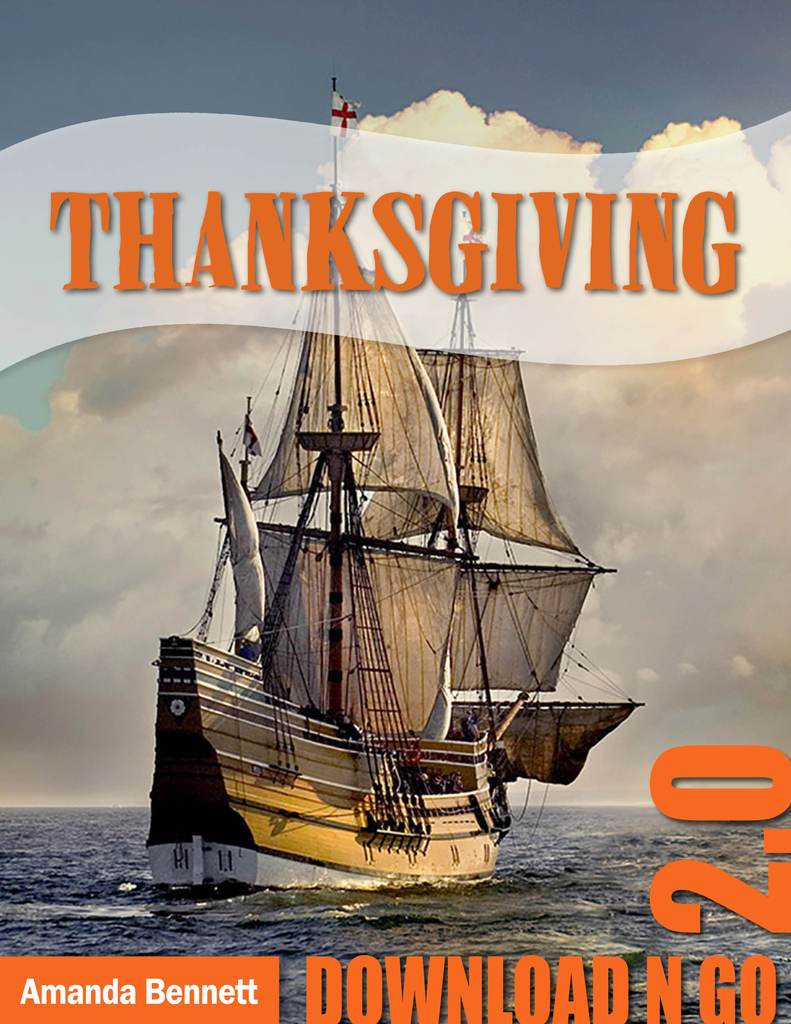
I can use an Early Settlers example. The events could be 1620 when Plymouth was founded; 1631 was the first Thanksgiving; the New World came to be was an event during that time. The people included are John Smith, Pocahontas, Squanto, and William Bradford. The places are the New World, Jamestown, Virginia, Spain, England, Britain, and the Atlantic Ocean. The terms to know are pilgrims, the Mayflower Compact, and separatists (among many others).
As you can see, these 4 categories will get you started in the right direction, and then you can build your unit study from there using additional elements. Of course, you are not limited to only these 4 categories above.
Referring to my earlier mention, below is a great moon unit study! You can just download and go, like an open-and-go curriculum – she’s done all the work for you. If you have a large family, this might be the way to go. I would at least check it out and see how’s she incorporates everything together. Click on the image below to take you there.

Step #6: Selecting the Resources (or Elements)
Now it is time to select your resources and activities to use for teaching your unit study. The fun part!
This part is the meat and potatoes of your unit study. It is in this step that you will decide all of the wonderful resources available at your fingertips to use in order to plan your unit study. And since you already know by now how long your study will be for, which means you know how many days long you will be teaching your unit study, then you have a good idea of how many resources to come up with.
I already gave you a pretty long list in step #2 of element ideas you can include. Here are some additional school activity ideas to include in your unit study:
- copy work (for handwriting) – print or cursive
- puzzles
- games
- coloring
- YouTube video(s)
- movie
- read a book (more on this in our next step)
- facts and features
- laddering
- biographies
- photographs
- picture study
- animals
- old documents
- poetry
- worksheets
- concerts
- audio clips/MP3
Although this is quite a bit to choose from when merging the two lists together, this is in no way touches what only your imagination can come up with. I would recommend choosing 3 (or 2 to 3, or 3 to 4) elements and then doing a Google search for those elements to see how many pages load on the topic.
From the elements you choose, perhaps pick 1 major one each day and then smaller ones to go with it. Decide on how long each day you want to focus on this unit study; then, decide how much time each element would take in your allotted time slot.s
Step #7: Selecting the Books
In this step you will select the book or books that will coincide with your theme. Perhaps you started with this step and, if so, that’s ok too. However, you may want to add an extra book or two into your unit study.
Books are aplenty to choose from so as you can imagine, the trick is selecting the right ones! A general rule is picking the correct books based on the needs of your family. Picture books for little ones, various levels for elementary, and chapter books. When selecting read alouds, always choose one or two levels above the child’s reading level because, although they may not know what some of the larger words are, the rich language itself will leave an imprint on them and will set a tone of literature for your child.
Keep in mind that you want to choose books based on the length of the unit study in addition to the needs of your family. So if it is a short unit study help your children choose books to read that they can finish by the time the unit is complete. Of course, there’s nothing wrong with continuing to read the book after the unit study, but the main idea is to magnify focus on the unit/theme during this set amount of time, and then discuss the book as a group during that time, preferably while your unit study is still en route.
Choose one book for a family read aloud, along with books for your children to read independently according to their abilities, reading levels, and interests. You want their independent reading time to serve the universal unofficial rule of 10 to 20 minutes per day, which is an ideal standard for elementary-aged children. They’re just getting used to reading on their own, so enriching their language and vocabulary through independent reading is a vital part of their overall development.
I also recommend getting 2 or 3 additional books, short in length, that you can read to the kiddos during a lesson – just pencil it into your planner on the day you’re going to read the book. Then, follow up the book lesson with verbal discussion (Why did that happen? What was the main idea of the story? What do you think happened after the last page?) or do a character analysis on the characters in the story. You could also follow up the book with a book report, where you have them write back what happened in their own words, identify the beginning, middle, end of the story, and discuss the major events.
I have a book report that you can download for free here:
Here’s another tip:
Help them out by creating a book list of title options for them to choose from. Some times too many is just that – too many options. When you narrow it down for them on a list they will be able to choose from there. Perhaps add a summary next to each title in easy-to-understand words that they can then read and be able to choose all on their own. This way, they feel involved and included by picking out their own book, even though you pre-selected the titles for them.
Another idea that’s super fun is picking an audio/mp3 or CD audiodrama to play in the car during the days you have unit study but need to go somewhere. On your way to soccer practice? The grocery store? Maybe you can plan a field trip about the unit study and on the way there you play the audiodrama.
In summary, you have (1) the family read aloud, (2) independent book for each child, (3) a few short books for 2-3 lessons, and (4) audio/mp3 or CD.
Step #8: Planning the Hands-On Activities
You will want to correlate a few hands-on activities or projects that are outside worksheets and reading books, especially for your visual and kinesthetic learners. Plan one or two of these days as “movement” activities. You can cook something together, do arts and crafts, and fun games to incorporate into the main theme. Just get the butts out of the chairs!
I mentioned earlier that you can add a major activity or project every day of your unit study and, while that is definitely a possibility, I would not recommend it. Not only would it be a lot of work for you, but you want to stagger your elements across the length of the unit study.
If it is a 5-day unit study, then perhaps make the project on the final day. If it is a 2-week unit study, then perhaps one major movement activity or project each week. Same for if it is a very long unit study, say 6 weeks, perhaps create a project once a week or every 2 weeks. Some homeschool moms do the batch method; that is, they create their unit studies for the entire year in one go right before the new school year starts! Now that’s ambitious – and admirable.
I liked this list of 62 project ideas I found online recently! I can’t wait to utilize these in our own homeschool!
Consistency will get keep the momentum going to prevent disorder and planning will prevent overwhelm.
One idea of a major project would be to create a sundial (science). Another idea would be to measure the circumference of a tree (math).
For an event category, you can dip candles or make your own lanterns for the Early Settlers unit study, even go as far as planning and cooking a mini-Thanksgiving feast! And since Thanksgiving is next month, having your children help cook Thanksgiving would surely make for a Thanksgiving and unit study that will be long-remembered.
You can do a character sketch with a person category for art class, or build a person with playdough.
Perhaps you want to go with a place category: in this case, you can visit a local museum, go on a nature study walk to identify a particular part of nature, study historical landmarks, or build a growing project together that you start on Day 1 and finalize on the last day.
For the terms category, you can use vocabulary terms for step #6 activity and then turn around and use those vocab terms by having the children make a model Mayflower!
In step #6, we establish the concepts of the unit and so this step is where the children will do hands-on projects branching off of those concepts they just learned.
Check out this Thanksgiving Unit Study below – it’s just a download-and-go unit study. All the hard work has already been done for you! This is a great way to ease into the unit study method and see how to put things together. I would at least click the picture and see how it encompasses all of the subjects.
Step #9: Using Music and Video
Incorporate music and video in any step above within your day-to-day learning; however, add an extra punch to it by watching a great movie for family movie night. Watch a documentary in your resources step and then let it all come full circle with the movie at the end of your unit study. Movies are always good for visual learners!
I like to add YouTube videos as elements throughout the unit study. I don’t make it a “major” ordeal; I just throw it in there if I think it would leave an impact or solidify a concept. And there’s so much to choose from!
Start by creating folders of Playlists in your YouTube account. Organize these playlists right off the bat so you won’t have to muck through so much later on when you need to organize then. Just start being organized right off the get-go. As such, you will be creating a lot of playlists at first. Eventually, you will have quite the collection of playlists, which will make it so much easier to locate a video created for “amphibians” or a playlist for “Manners” so it will be easy to just add to playlist as you go through YouTube.
I always stumble upon some fascinating educational videos for the kids, seemingly when I’m searching for something else totally unrelated to what I found! I just add that video to the appropriate playlist and it’s there for me for another day.
Make it a habit to check your YouTube Playlists when creating your lesson plans for the unit study. You will soon see that you have some jewels in there!
During the unit study, perhaps in your Morning Time, you can sing hymnals or theme-related songs as Brain Breaks. Songs are a great way for your auditory learners to master concepts. Have your children memorize each line for each day and on the final day when Dad comes home from work, make a huge, dramatic presentation where the kids sing the full song word-for-word! This will be a song (and unit study) both kids and Dad will love. I’m sure Dad will appreciate the attention and hard work that kids and Mama put into it for his “surprise” musical presentation.
As you can see, these ideas I listed are just the tip of what you can create for including music and videos into your unit study. I would love to hear how you did it in the comments!
Make it a habit to check your YouTube Playlists when creating your lesson plans for the unit study. You will soon see that you have some jewels in there! @humorhomeschool
Richie | Homeschool and Humor Tweet
Step #10: Ending the Unit Study
Always good for your read-and-write learners, do 1 or 2 quizzes a day just to ensure that everyone is understanding the concepts. Have older children write a final composition project for what they’ve learned and have younger learners pinpoint the parts of a story with details or identify major events on a timeline. Use book report forms (make sure you grab yours above) for their independent reading books and assign the final quizzes with the main points of what you taught them.
On some of these ideas, you may have to create your own quizzes and/or tests since each unit is different from each other, but you can always save what you create as a template for future unit studies; just tweak parts of it for the next time.
That musical show you put on for Dad? Make that a final project and keep score in the background. Create worksheets (or find some in my resource library or on TeachersPayTeachers) for quizzes or create easy MS Word documents to wrap up the unit study, Word will be your best friend throughout the unit study, so if you’re unfamiliar with the program I would highly recommend enlisting in a course for further learning and personal development.
Since we touched on the Early Settlers unit study a few times, make a fun “What I Am Thankful For” sheet and have the kids cut things out of magazines and glue on the sheets. Create a Venn Diagram where the kids can compare and contrast their life together versus the lives of pilgrim kids back then. Compare the lives of pilgrims with the lives of Indians after reading your read aloud book.
In this step, you are wrapping up the unit study with a big “hoo-rah” and making everything come full circle for your kiddos. At this stage everything that they learned should be summed up on this day for a finale. This is how you will assess your child’s developmental growth, and perhaps decide if unit studies are right for you and your family.
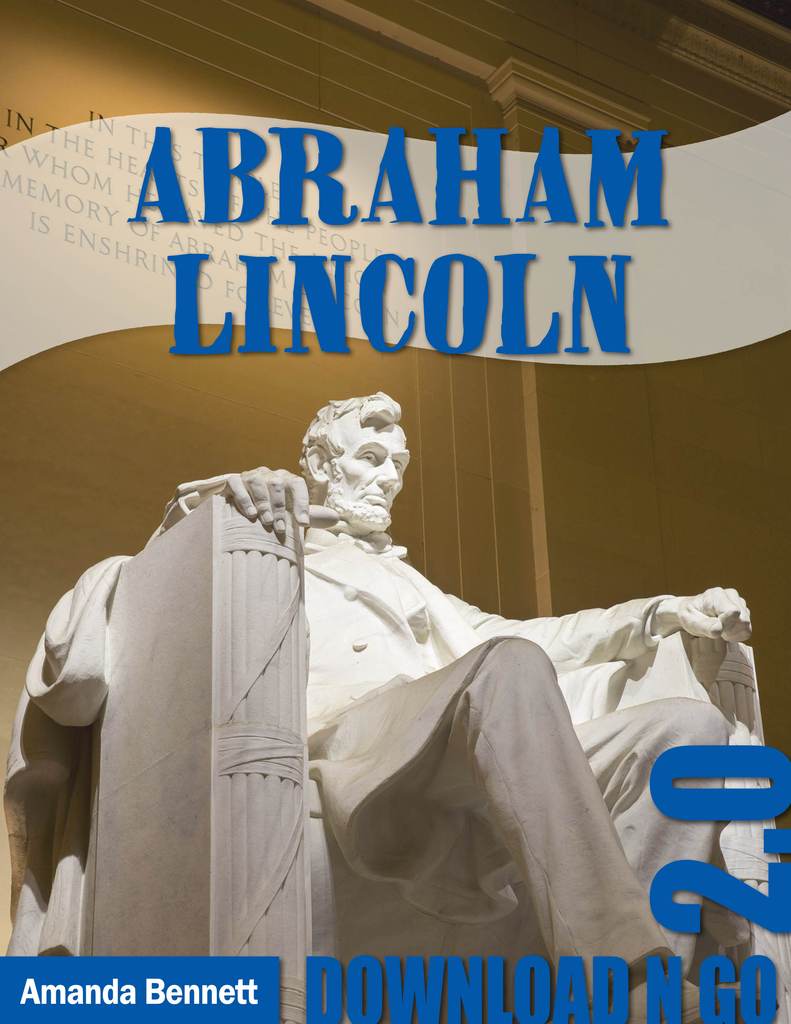
Here is a neat Unit Study on Abraham Lincoln. To see how to circulate a unit study focused on People or even on the Famous Americans of U.S. History, I would check out this Download-and-Go unit study below.
Record and Document Your Successful Unit Study
Once you have your unit study under your belt, and your children’s belts, record it! Although we did not discuss this during this article, lapbooks and notebooks are a great way to record everything they learned for record-keeping. To make your unit study a memorable one on paper, you can add a daily journal prompt on what they learned at the end of each day. You can create lapbooks, however, from the unit study that they just finished and it will be yet another hands-on project that they’ll remember. I found a fabulous resource for free lapbook templates here.
Also, take pictures! If you make some amazing creations that can’t be easily kept take a picture and it to their daily journal or lapbook. Have lots of fun and lots of laughs, then snap a quick pic of those as well to paste inside journals.
You will pull out those dusty journals one day, flip through them with melancholy and nostalgia, and remember how wonderful that season of life was when you and your children spent those homeschool days learning together.
Using Unit Studies to Reach Multiple Children
Many eclectic homeschoolers swear by the Unit Study Method and I know why. It is a way to reach all of your learners in one go: visual, kinesthetic, read/write, and auditory.
You can capitalize on Unit Studies by teaching multiple children at the same time. Although the material will be the same, the elements of a unit study will cater to the education level for each child. You can have a young elementary child verbally summarize the points of a story to you while an older elementary child writes the parts of a story. Even older children can write traditional essays for the story while high schoolers can write 500-1,000 word essays of a story. Younger children can memorize and copy write poetry while older children can decipher poetry and meanings.
Resources
Plenty of resources abound the world wide web on how to make a unit study. You can find free ones to paid ones, even find some on Amazon. Here are a few resources that I recommend if you want to start with a paid unit study to get into the swing of things. No harm in that!
- Science Unit Studies for Homeschoolers and Teachers
- Christian Family Homeschooling Curriculum: Delight Directed Learning Guide for Ages 7-17 – Includes daily bible reading, units studies, science, reading, spelling, history, art and logic (volume 2)
- A Season of Science: Easily Plan 12 Weeks of Science Unit Studies
- Everything You Need to Know About Homeschool Unit Studies, The Anyone Can How-To Guide
- Unit Studies Made Easy
I would love to hear about your unit study endeavors, especially if you are new to the unit study method. Leave a comment below and share some insight with your fellow moms on how you go about your unit studies. If you liked my article, share the love!
Free Unit Study Planner
Organize your best self - Grab your free Unit Study Planner!
Thank you!
You have successfully joined our subscriber list.
Where to go from here? Check out where you can grab a very long list of Free Homeschool Resources here!
- 111 Best All-Time Middle School Movies List (In Categories!) - April 26, 2024
- Top 16 Indoor Games for Teens That Won’t Turn Your House into a War Zone - January 29, 2024
- Free Crafty Printable Christmas Countdown Calendars For Kids - December 17, 2023


This is a very thorough explanation – so helpful. I love the tip of using a spreadsheet to help keep track of information. I can see a couple of ways to use it within the unit study to track books, videos, and the other resources you mention in your post.
Thanks, I’m glad you liked it. I currently use spreadsheets and calendar alerts to keep me in line. 😉
I go back and forth between being too exuberant and going overboard and not doing enough when I get into unit studies. But I am always a little bit of an add-in this sorta mama.
I’m the same way. Sometimes a “skeletal” curriculum is the perfect jumping off point to some amazing teaching and learning moments later on! Homeschooling is flexibility!
wow! Very helpful and informative. Now on to make my own! 🙂
Glad you found it helpful for your homeschool!
Wow! Thanks for this! I love how specific you were. Sometimes it’s hard for us homeschool mamas to come up with unit study ideas.
You’re so welcome. I’m glad you enjoyed it. Thanks for the reply!
Pingback: Free and Cheap Homeschool Resources and Links During COVID-19 Crisis » Homeschool and Humor
Great read!!! Thanks for sharing such a great blog.
Thanks Ashley! Glad you liked it.
Heya.
This is my story in order to begin with. Last month we did a interesting unit study on airports and airlines. Firstly we made a typed up list of airports and airlines of the United States. Good luck to you and I love your posts as well. We practiced choosing our airline meal and making a dummy booking. That was a lot of fun seriously.
Nice to meet you too. Then we called one airport in addition to ask them about how they functioned on a daily basis. We did the same thing for American Airlines. I got as much helpful information as I could possibly find on airline careers and so on by looking at their site. I emailed back and forth in case. I was totally prepared.
We did some guided research. And we made some brief summary notes in case to describe our own findings in question here. I got the children to calculate the numbers of travellers at the airport each year. They also had to find out details on the flight crew who were working on the planes. I asked a flight crew member to talk about pros of working on a plane.
I love how you incorporated all that into your unit study! Such great ideas!